Documentation
The Servd Workflow
There are loads of ways to organise your deployment processes, but Servd provides a few tools that make certain workflows more, well... workable.
This is the process that we use for sites that are hosted on Servd and that we're actively developing. Like this very site!
Project Config #
We use Craft's Project Config to sync our changes between environments. There are a lot of benefits to using it, the primary one being that you don't need to manually apply changes to plugins and data schemas in every environment.
However there is one caveat: your development flow needs to be uni-directional. All your changes need to be made in your primary development environment (probably local) and then synced up through staging and production. Making changes directly to production can lead to bad things happening. You can read some specific warnings about what might happen if you don't abide by this rule here.
To make sure there aren't any rogue developers making schema changes in the production environment we always set allowAdminChanges: false in all of a project's environments other than local.
Local Development #
Getting in Sync
Because all changes to our project are made in the local environment, local is always the most up-to-date. So there's often no need to sync anything down from production before we can start confidently making changes.
The one exception to this rule is when we want to test against production content, like blog posts that might have been created on a live site.
In order to get hold of these we can perform a database dump of the production site via the Craft Control Panel, or download a recent database backup from the Servd dashboard.
If we import this database dump into our local database we might be prompted to sync any pending Project Config updates, but once complete we should be up and running with all of the content from our production environment.
Making Changes
Servd doesn't have any special requirements on how you go about making updates to your projects.
Code away to your heart's content. Maybe update your dependencies in composer.json. Then commit and push those changes.
As long as your changes end up being checked into your project's Git repo, they'll be available for you to deploy on Servd.
Note: if you aren't using project config your data schema changes won't be checked into your Git repo. You'll need to apply these changes to each environment manually either by making changes in the Craft Control Panel or importing an updated database dump.
Build a New Bundle #
You can build bundles based on any commit in your Git repository. If the commit exists, you can bundle it. So we can head over to the Servd dashboard, Create a Bundle and make sure to choose our latest commit.
The new bundle will be built with the latest version of PHP and Nginx that we have tested and made available. This ensures you always have access to the latest security patches and Servd features.
Clone Production To Staging #
Before we deploy our new bundle to staging, we like to do a full clone from production to staging. You can do this in the Servd dashboard by navigating to Staging > Import > Clone From Environment.
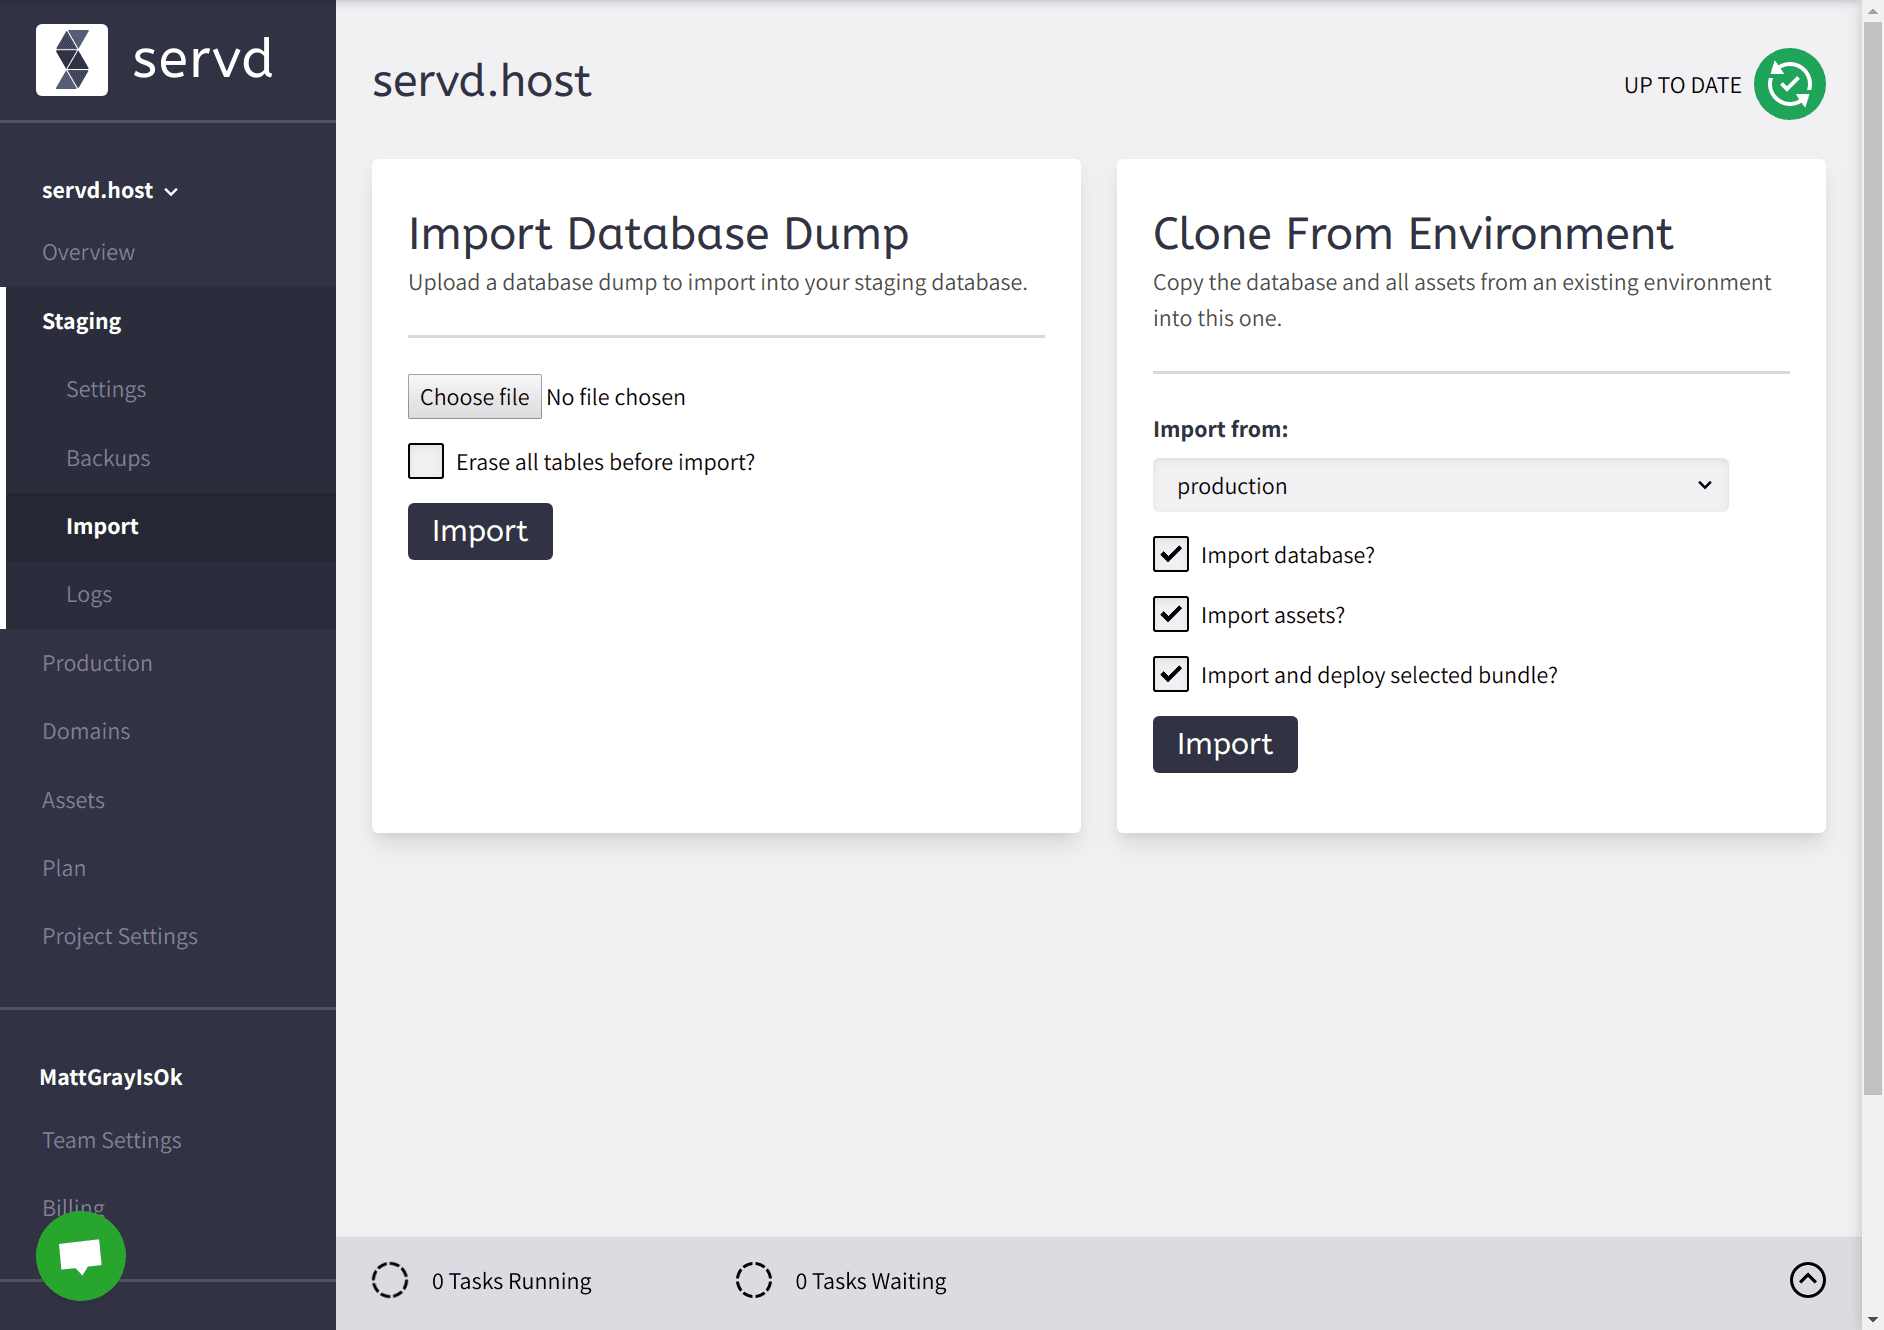
By cloning the database, assets and the currently selected production bundle our staging environment becomes close to an exact replica of our current production environment.
This allows us to make sure the deployment of our new bundle is being tested against the same conditions as will be present in production.
We can be confident that if it works in staging, it'll work in production.
Deploy To Staging #
Now that we're all set up we can test our new bundle in our staging environment. We follow the process for selecting the bundle and then syncing our changes.
Because we're using Project Config we have 'Automatically run migrations and project config sync during deployments' activated in our Project Settings. This ensures we have minimal downtime once our new bundle is deployed as any Project Config changes will be applied immediately afterwards.
Once our changes have synced we can test out the site using our staging environment's URL. If everything looks good we can push our changes to production!
Deploy To Production #
We've already built our bundle and we know it will deploy, apply its Project Config updates and function correctly, so we're confident taking our next steps.
There are actually two workflows that we can use for this final step:
- Select the bundle for the production environment and sync.
- Add or change content within the staging environment and then perform a clone from staging to production.
The first option is straight forward, we're just doing the same as we did for staging. The second option is really useful if your update requires some changes to content or assets that aren't included in your Git repo. We've already cloned production down to staging in a previous step, so we can now clone from staging back to production without losing any data!
In fact, we could line up a ton of content changes in our staging environment and then deploy them all to production, along with the new bundle, by performing a single environment clone operation. That's pretty cool! 😎
Alternatives #
This is the flow that we use to make updates, and it works really well for us, but it might not work for you and that's ok!
Each environment can be used individually so if for some reason you want different data schemas in local, staging and production, feel free. Just remember that the tools for creating and deploying bundles, as well as cloning environments, are there for you to use in whatever way suits your workflow.